 My partner in crime Serge Luca aka Doctor Flow is the author of a nice and complex expenses approval system in Microsoft Flow .
One year ago, he asked me to add analytics to his Flow. This year he has the interesting idea to add a machine-learning based approval in his flow and suggest me to work on it. The idea is the following: Since we have a lot of approvals in our system, can a machine learn and found some decision pattern to apply automatically to each expenses request ?
I decided to use the Microsoft Azure Machine Learning Studio. In this tool you can build experiments and use some of the most common and useful machine learning algorithms. It was amazing to see how easy it is to create and consume machine learning .
The steps are simple
- Provide the data
- Train the machine learning model
- Score and evaluate the model
- Publish the trained model as a Web service
The output of step 4 is a Web Service that can be consumed by sending an expense and by receiving an approval status plus his score of confidence. This web service therefore can be considered as our VIRTUAL BOSS.
1. Provide the data
First of all, I needed to have a lot of data to train the system. Training the system is a one shot process (although you can continue to enrich it )
In Azure Machine Learning Studio you can use different source of data. You can even copy paste csv-formatted text into their editor. As I needed a huge amount of data to make it work, the natural answer to me was to store it in an Azure SQL database. To do so, I exported our actual SharePoint expenses list to a table and I did used cross joins queries on our existing data..
This is fine to obtains millions of rows (66 million actually) BUT of course your data are totally evenly distributed because the result is a Cartesian product. This means it will be impossible to make decision on base of that. Therefore, I introduced some pattern into my data: making all expenses below 500 € with an approval status. Reject all expenses above 500€ in Las Vegas in the category entertainment (because you need demo with a little of fun and speaking about entertainment in Vegas seems always friendly to the audience. no idea why…) I also put a rejection on Tokyo expenses above 500€ in the category transportation above 500€. Will my virtual Boss be able to detect and learn to approve that way ?
Once the table generated, it was quite simple to use it in the studio.
The recipe
Use the Import Data in “Data Input and Output” menu
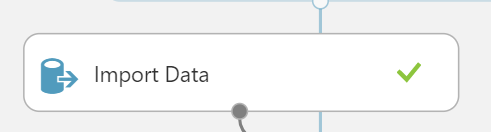
Then connect your Azure SQL database and choose your prepared table.


2.Train the model
To create the right machine learning model you will need to score the result. To do that you must split the source dataset to keep a part to compare the results of the trained model and the actual result in your source. This step is the next block that you will create after importing your data. Usually we use a ratio of 0,7 to feed the model.


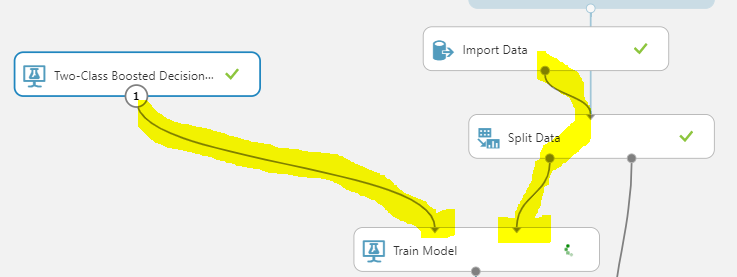
After the split , you can create the ” Train model” action and connect it to your split data block
Then the most important choice is the algorithm that you will use for you model. We need a decision model. The Double Boosted Decision Tree is a good candidate for this job.


Generally, when properly configured, Boosted Decision trees are the easiest methods with which to get top performance on a wide variety of machine learning tasks. However, they are also one of the more memory-intensive learners, and the current implementation holds everything in memory.
A Boosted Decision tree is an ensemble learning method in which the second tree corrects for the errors of the first tree, the third tree corrects for the errors of the first and second trees, and so forth. Predictions are based on the entire ensemble of trees together that makes the prediction. (source: Microsoft)
I trusted the default parameters -as the lazy person I am- and complete the connection to the “train model” block. At this stage .. Your experiment should look like this
3.Score & Evaluate the Model
Once the model trained, the output will be “scored” against the other part of the data set to evaluate the degree of accuracy.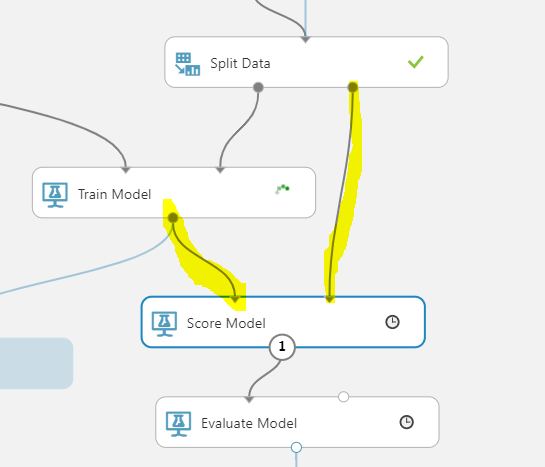
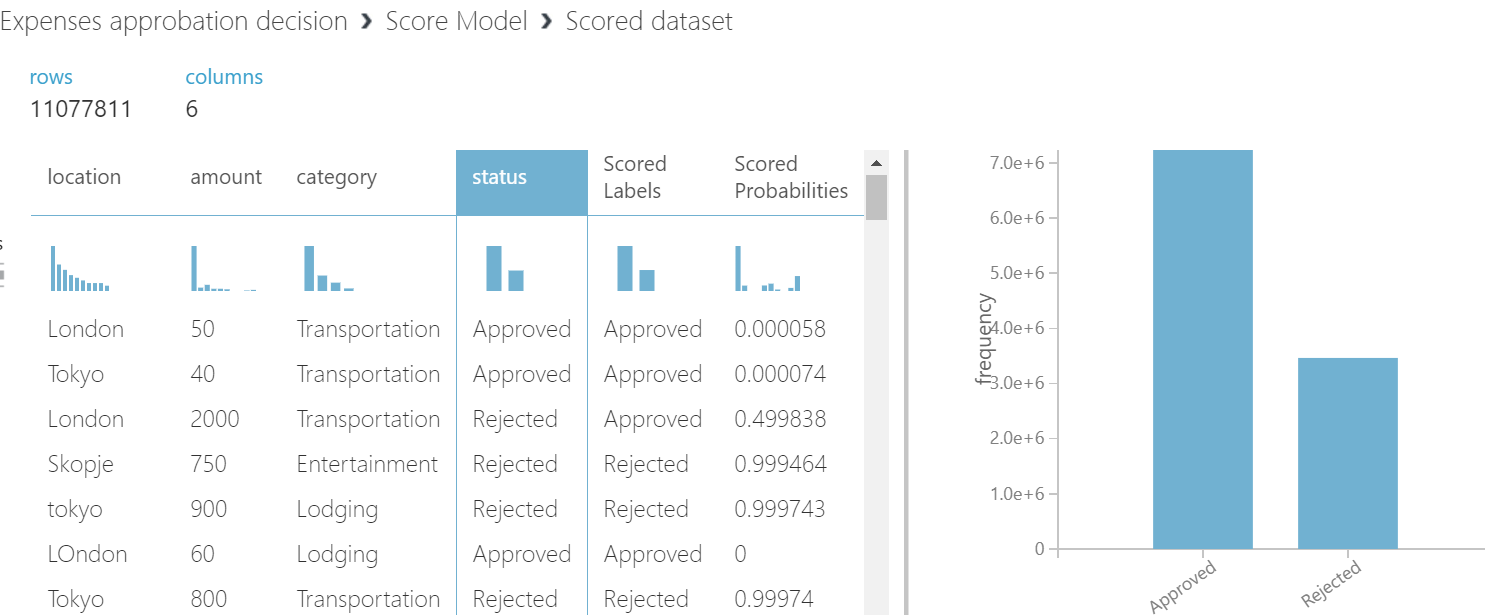
After you have generated a set of scores using Score Model: Right-click the module and select Visualize to see a sample of the results.
For classification models, Score Model outputs a predicted value for the class, as well as the probability of the predicted value
Evaluate the model: This step will be to check if you model is trustable and will generate a set of metrics used for evaluating the model’s accuracy (performance). you can connect the scored dataset to Evaluate Model.
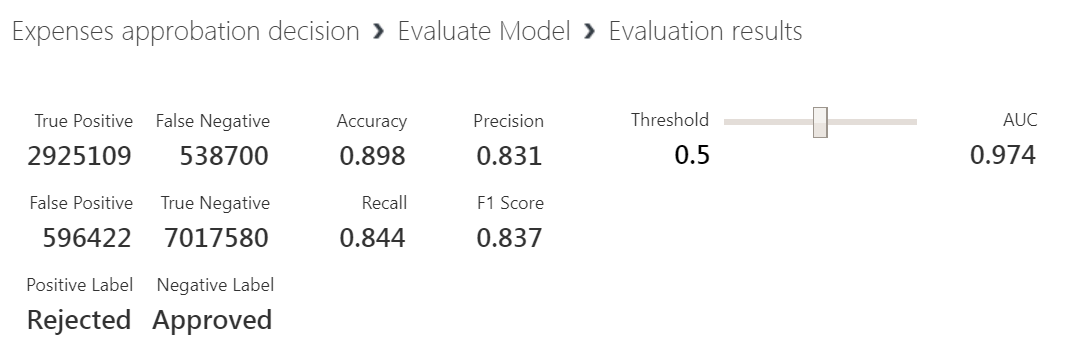
Metrics for classification models (source :Microsoft)
The following metrics are reported when evaluating classification models. If you compare models, they are ranked by the metric you select for evaluation.
• Accuracy measures the goodness of a classification model as the proportion of true results to total cases.
• Precision is the proportion of true results over all positive results.
• Recall is the fraction of all correct results returned by the model.
• F-score is computed as the weighted average of precision and recall between 0 and 1, where the ideal F-score value is 1.
• AUC measures the area under the curve plotted with true positives on the y axis and false positives on the x axis. This metric is useful because it provides a single number that lets you compare models of different types.
• Average log loss is a single score used to express the penalty for wrong results. It is calculated as the difference between two probability distributions – the true one, and the one in the model.
After that my confidence in the model was built.
4.Last step! The publication as Web Service
At this stage I was pretty excited to test my model and share it with Doctor Flow !
Azure Machine Learning Studio does have an amazing deployment framework.
Once you have saved your trained experiment as a Web Service, a new tab will appear called “predictive experiment”

Go the web services part of your experiment (right menu)
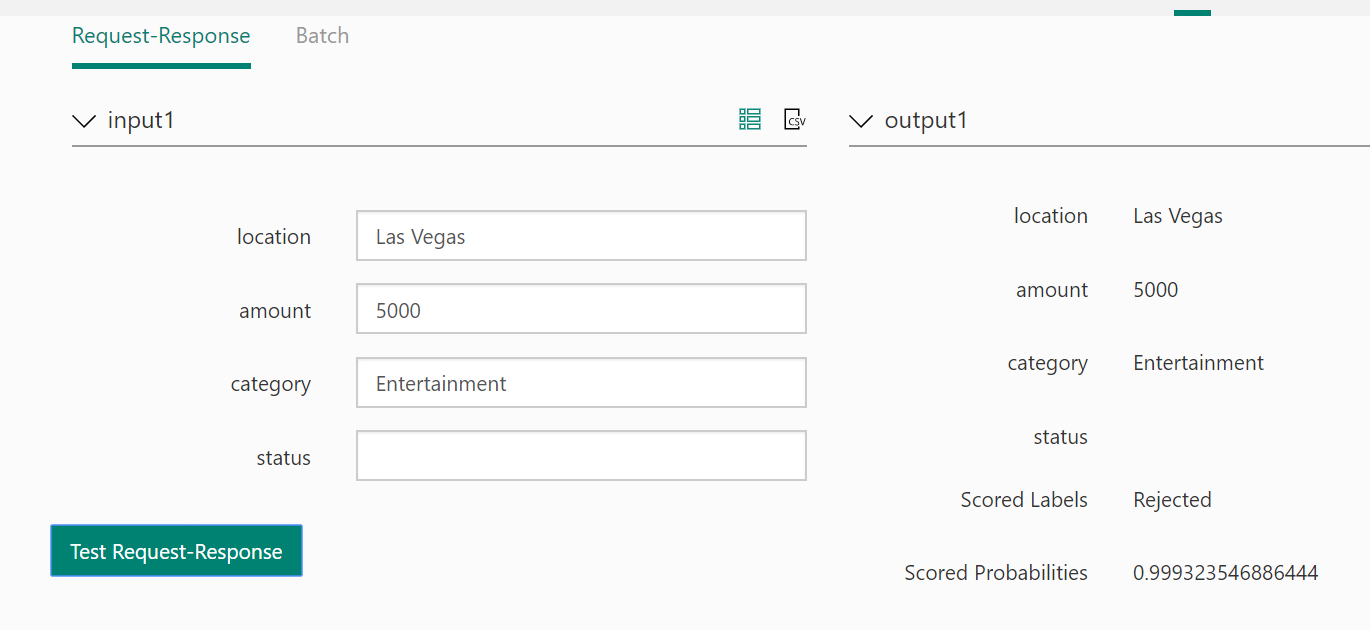
Then you can use the web service consume page to test it. So I directly tried one of my “injected pattern” — Leisure in Vegas!!!
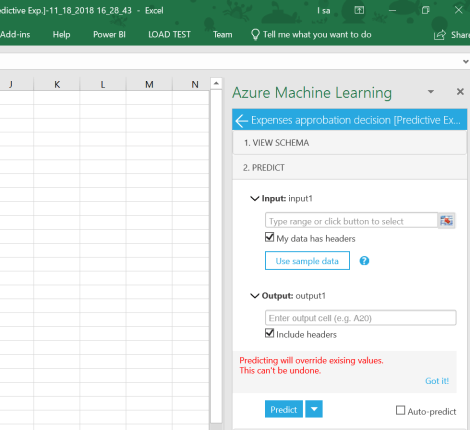
You can also give a try to the Excel add-on, You will directly download an Excel file with the pre-installed add-on
To let Serge consume the service, I needed to provide him the Swagger API Document
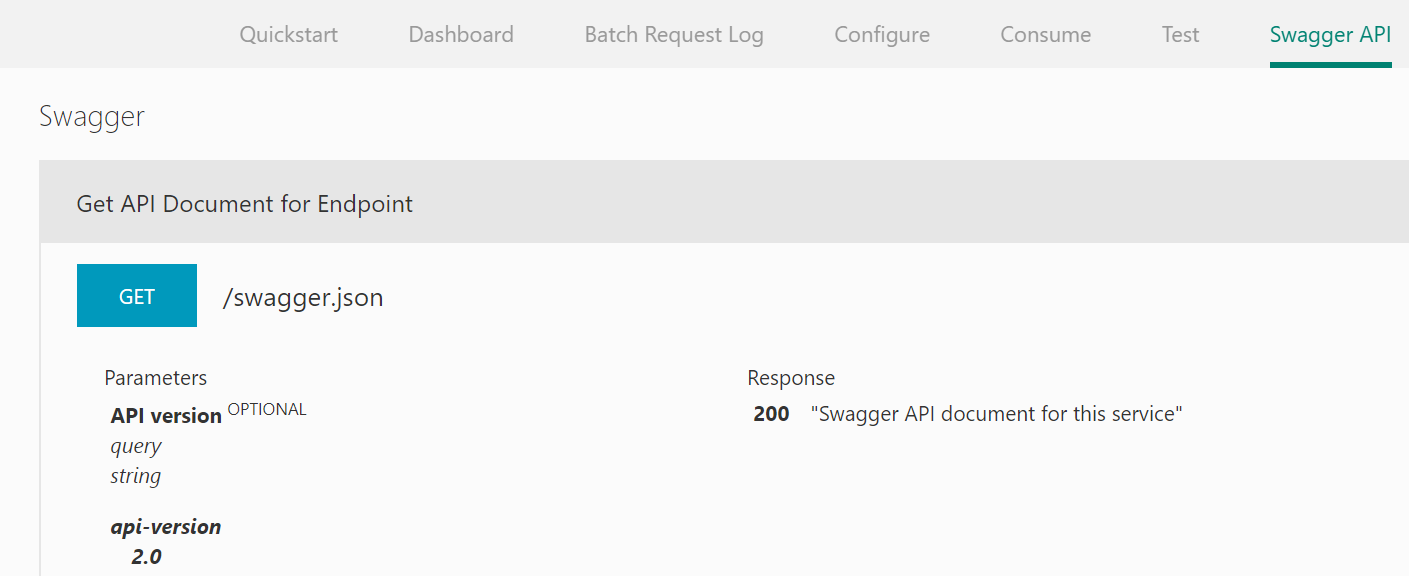
After that he received the needed file to start his part
You can follow the story here

1 thought on “Using machine Learning for an approval expenses process.”